Many semantic technology projects have a repository of relational databases. These (legacy) databases often contain data that has not been converted into RDF or OWL, and is therefore not accessible for ontology-based services. D2RQ is an open-source project by Chris Bizer and colleagues at the Free University of Berlin. D2RQ is a declarative language to describe mappings between relational database schemata and RDF ontologies. The mappings allow RDF applications to access the content of huge, non-RDF databases using Semantic Web query languages like SPARQL and to run inferences based on rules or description logics on the databases.
TopBraid Composer provides an interface to arbitrary relational databases using D2RQ, so that the databases can be treated as a (read-only) triple store. The approach is based on mapping files that declare how the tables in the database map into individuals of an ontology. Since the mapping files are RDF models, Composer itself can be used to edit the mappings. You may find it useful to familiarize yourself with the D2RQ mapping language before using this feature.
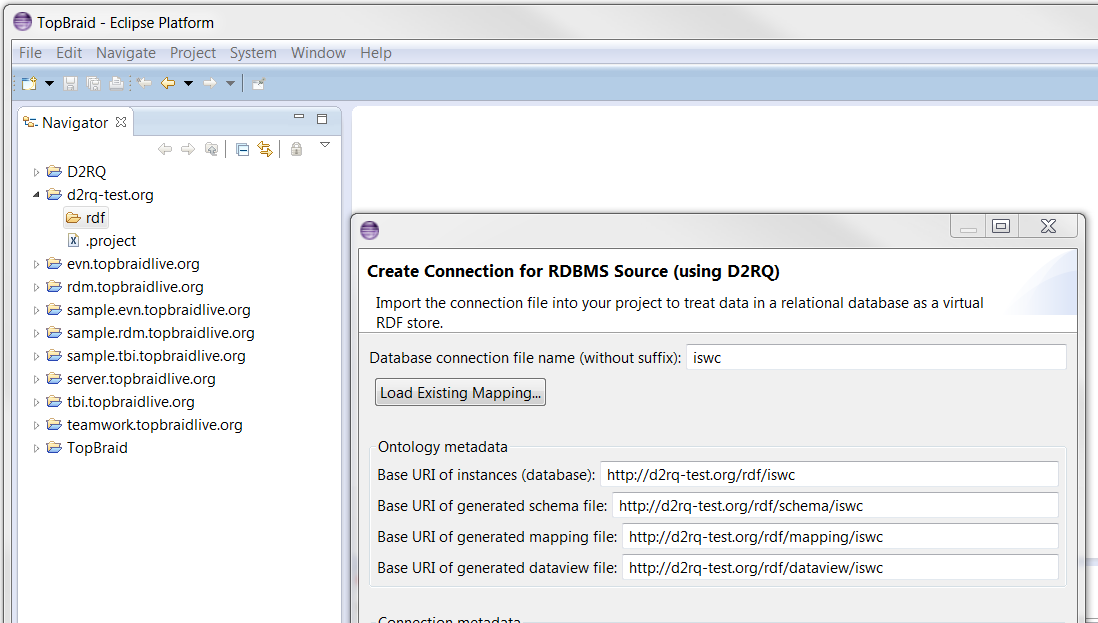
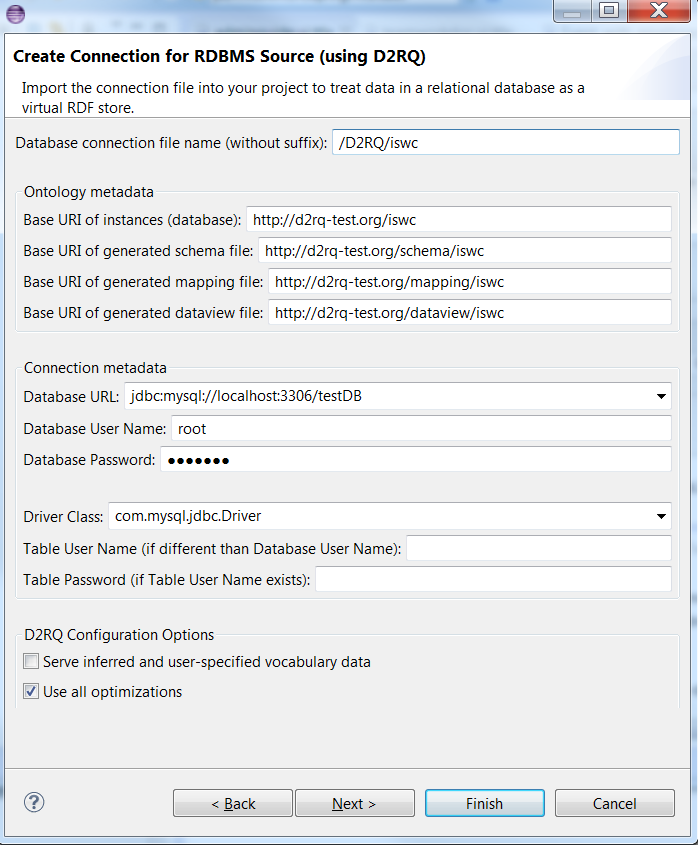
In order to get started, please make sure that you know the connection parameters to your database, and verify that TopBraid includes a suitable JDBC driver. Then select a target folder in the Project Explorer and select File > Import... > Create Connection for RDBMS Source (using D2RQ). This will open the following wizard:
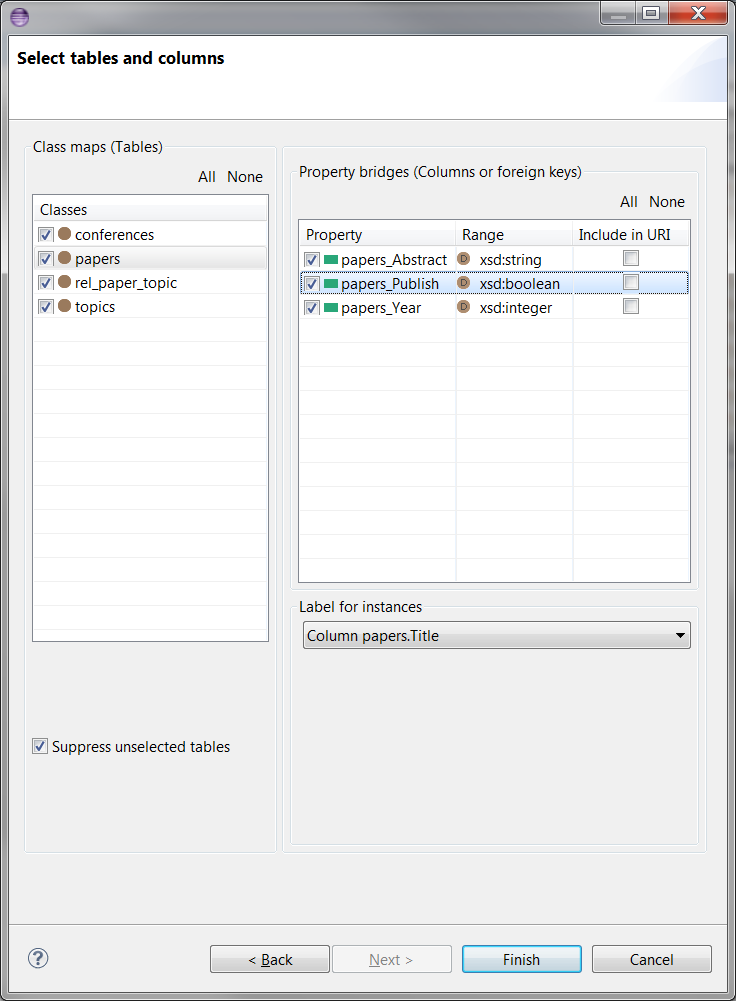
If you click Next, you can select the tables, columns and labels to import:
For more advanced operations of the wizard, see Using the Wizard (Advanced) section below.
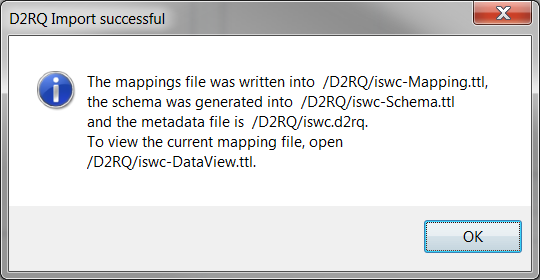
When finished, this wizard will create the following files (for the example name "iswc"):
You can not open the instances database on its own, because it does not contain any class declarations, and browsing instances without class declarations is not useful. Also, the database is not editable, and TopBraid assumes that the primary triple store of each project be editable. Therefore, always import the database together with the schema file into some (other) project.
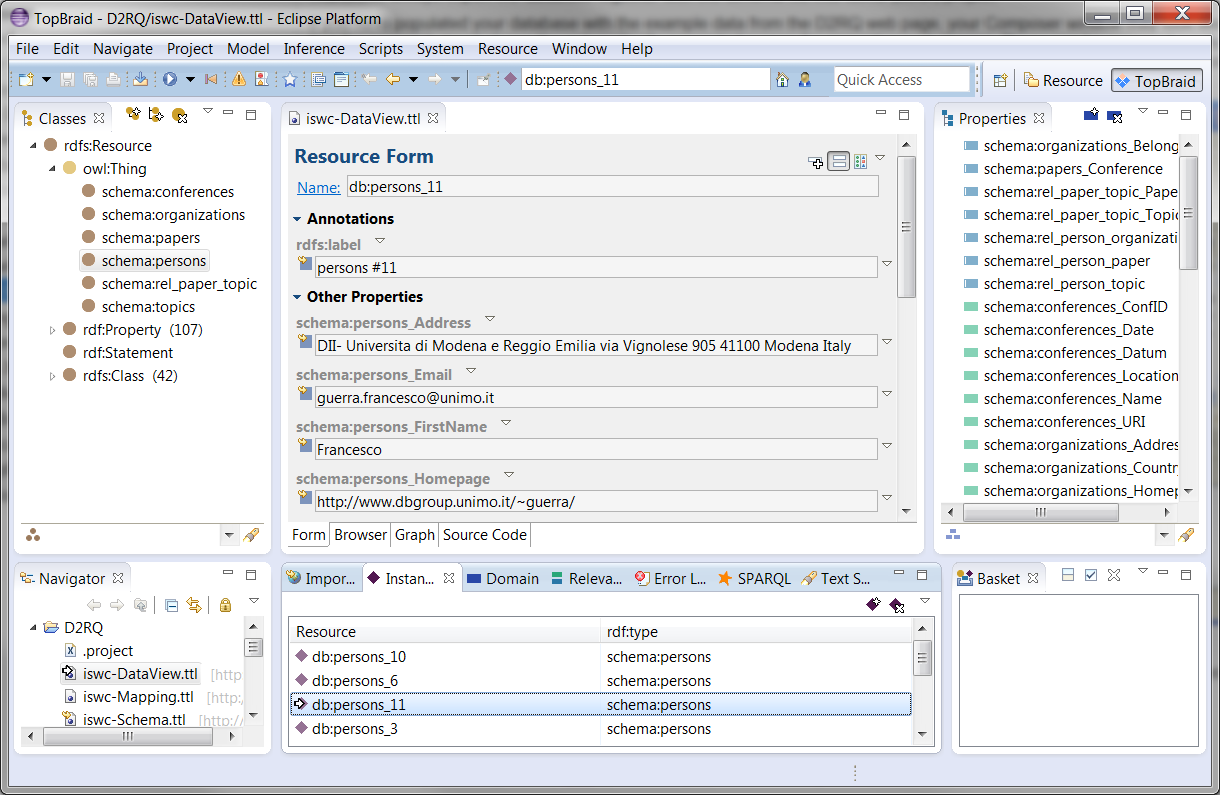
If you have populated your database with the example data from the D2RQ web page, your Composer window may look like the following. Note that the screenshot just shows the automatically generated names for properties and classes. These can be renamed easily - by open the mapping file within Composer. In order to generate more meaningful names and values for the instances, you need to customize the mapping file, following the various patterns of the D2RQ mapping language.
If you already have a mapping file and just want to see how it looks in TopBraid Composer, then place the mapping file in your workspace, and in the same folder create a file ending with .d2rq with the content like in the following example:
MappingFile=iswc-Mapping.rdf
BaseURI=http\://example.org/iswc
If you want to try this out yourself, here is the example database in MySQL format.
Once the database has been imported like this, you can perform arbitrary read-only operations on it, for example to execute SPARQL queries. You can also copy the virtual triples of the database into some other model, for example using the Export Wizard, so that they can be more efficiently used for semantic applications. Note that if your relational database is populated by external applications while Composer is displaying it, you may not immediately see the changes on your screen. Composer maintains caches of selected triples and these caches are not updated after each external change.
A D2RQ database can be queried in any model, such as the -DataView ontology created by the D2RQ wizard, that imports the read-only .d2rq connector file. The default SPARQL query engine is used in such queries, which will treat the query as a federated query. For improved performance, it is recommended that the query for the database back end be sent directly to the D2RQ query engine using the SERVICE keyword:
SELECT *
WHERE {
  	SERVICE <base-uri-of-your-D2RQ-ontology> {
       ...
  	}
}
The following will query the iswc example, where the base uri of the .d2rq file is "http://example.org/iswc":
SELECT *
WHERE {
	SERVICE <http://example.org/iswc> {
		?person a schema:persons .
		?person schema:persons_FirstName ?firstName .
		?person schema:persons_LastName ?lastName .
		?person schema:persons_Address ?address .
		?person schema:persons_Email ?email .
	}
}
The D2RQ import wizard, Create Connection for RDBMS Source (using D2RQ), supports various operations to selectively import data. You can create new or modify existing D2RQ mappings, select tables, columns and labels in various ways and swap domains and ranges of properties derived from columns.
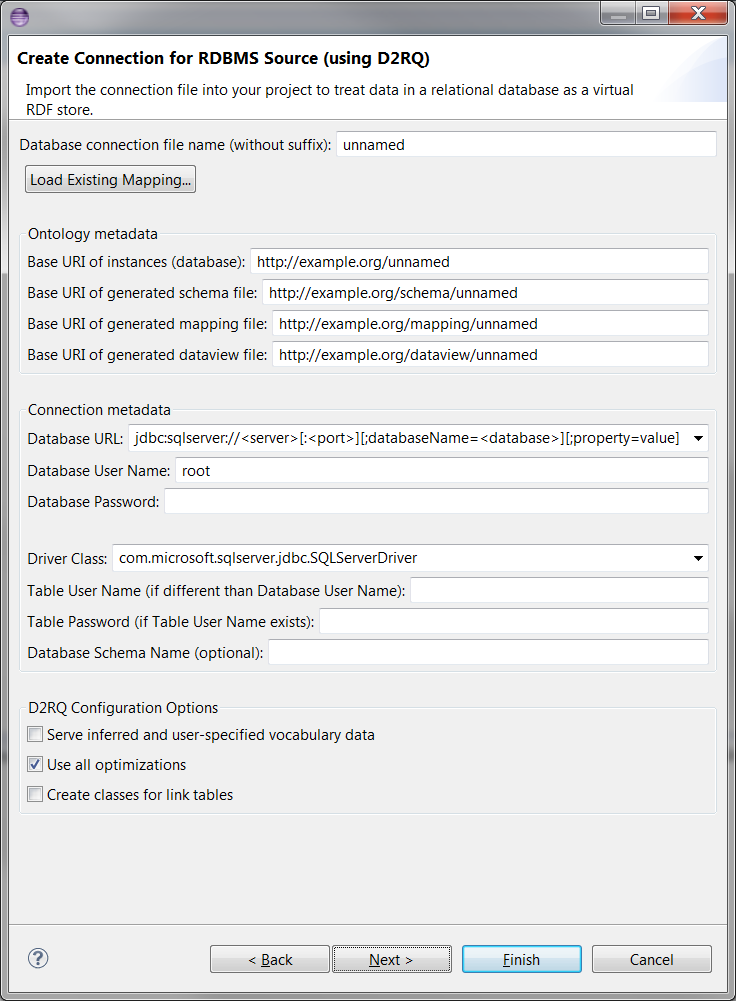
First please verify that TopBraid includes a suitable JDBC driver for connection. For Oracle, you don't need it. For MySQL or SQL Server, see separate page. Then, select a target folder in the Project Explorer and select File > Import... > Create Connection for RDBMS Source (using D2RQ). You can then enter the Database connection file name at the top of the wizard, which auto-completes the baseURI fields as shown below.
Alternatively, if you selected a target folder that has a parent project with a domain-like name, then all the auto-completed baseURI fields would start with the folder path and end with the Database connection file name as shown in the following:
By clicking on the drop-down list near Database URL, you can select a URL template and then enter the database URL. You can also specify the related driver class from Driver Class drop-down list.
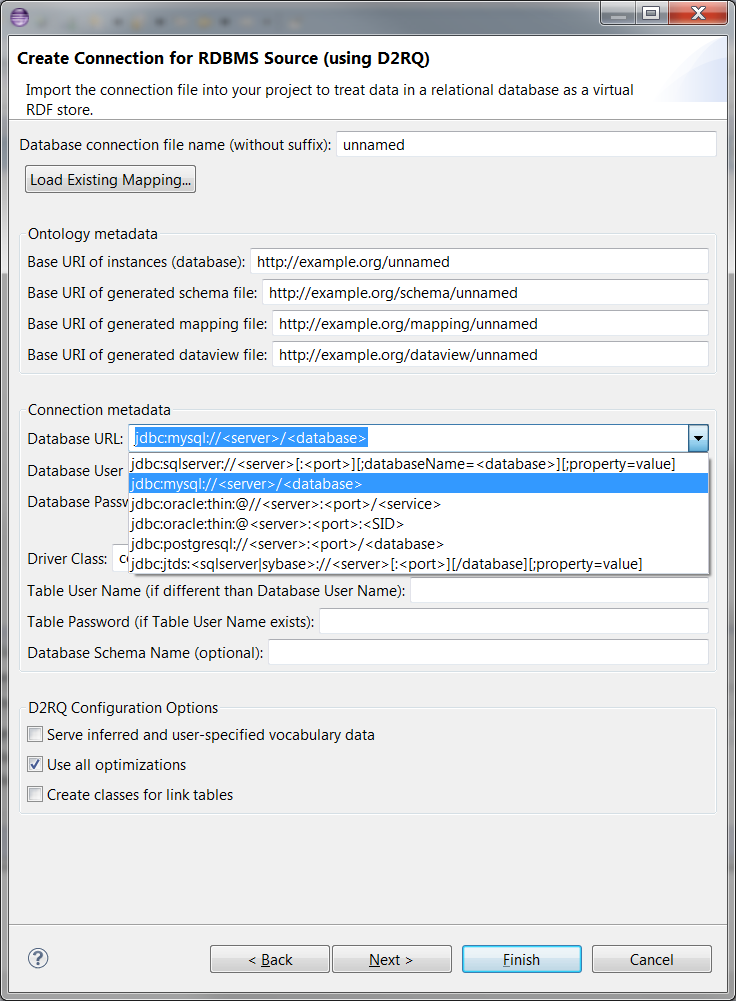
Please enter the values for Database User Name and Database Password. The password will be stored in secure storage rather than the mapping files.
If the user credentials for retrieving the database metadata are different than the user specified previously, enter them here. These credentials are not stored in the mapping file.
If the database defines multiple schemas and the user credentials or connection string do not constrain the schema, you can specify a schema in this field. This may be case sensitive.
This option determines whether the data model generated by this mapping will serve vocabulary data along side the database data. It is not selected by default.
When selected, this option activates any optimizations available in D2RQ. This is selected by default.
A table that links two other tables in a many to many relationship and contains only two foreign key constraints is considered a link table. By default the mapping generator does not create a class map for a link table. It will instead create an object property in one of the participating classes with the data type as that of the other. When this option is selected, the mapping generator will create a class for the link table with two object properties.
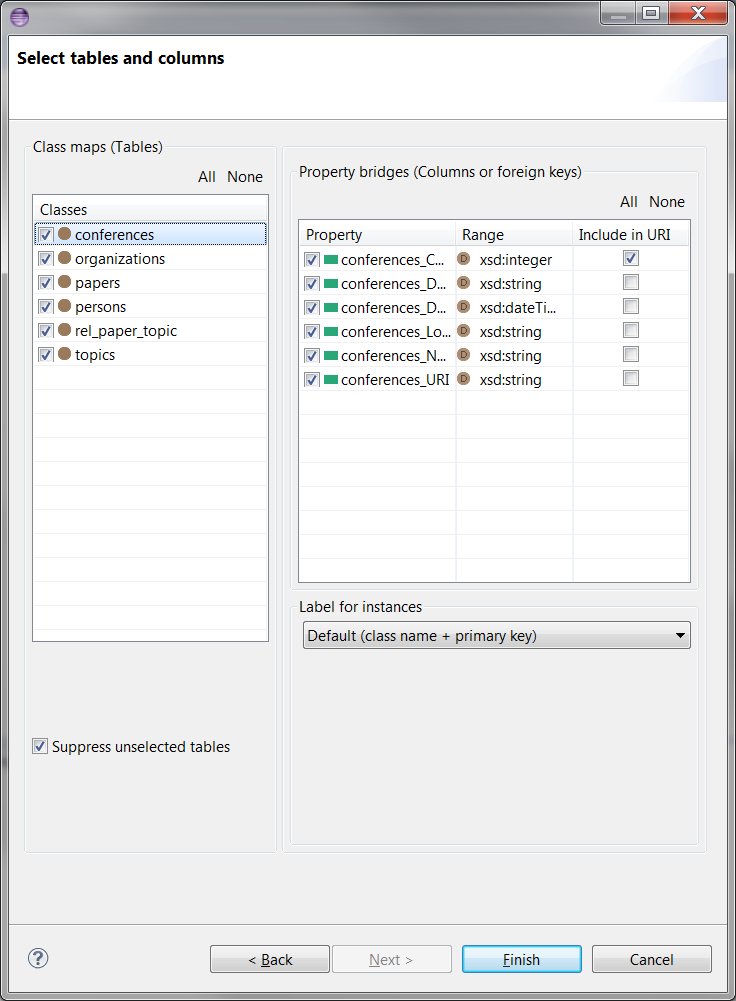
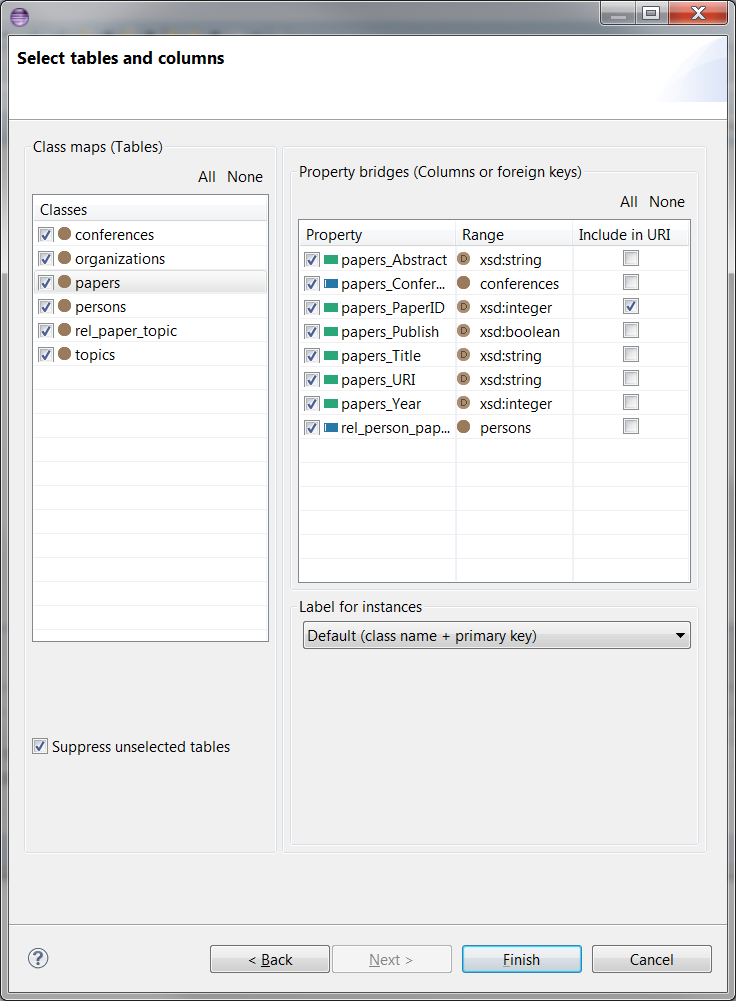
When you click Next, the wizard will load tables and columns directly from the database using D2RQ engine, and you will get the wizard page in the next section.In Select tables and columns page, you can select or unselect class maps (tables) and property bridges (columns or foreign keys). You can click on All or None buttons for selection of all or none tables or columns. Suppress unselected tables is more useful with existing mappings and described in Suppressing unselected tables section. Here is an initial look for the page:
The mapping generator creates a URI template for each class map. This template is used by D2RQ to create the URI for instances of the class. By default this template includes the primary key or keys from the table that create the class map. Sometimes the database may not have primary key constraints defined for a table. If this happens you can use the checkboxes in the far right column to select which properties are to be included in the URI template.
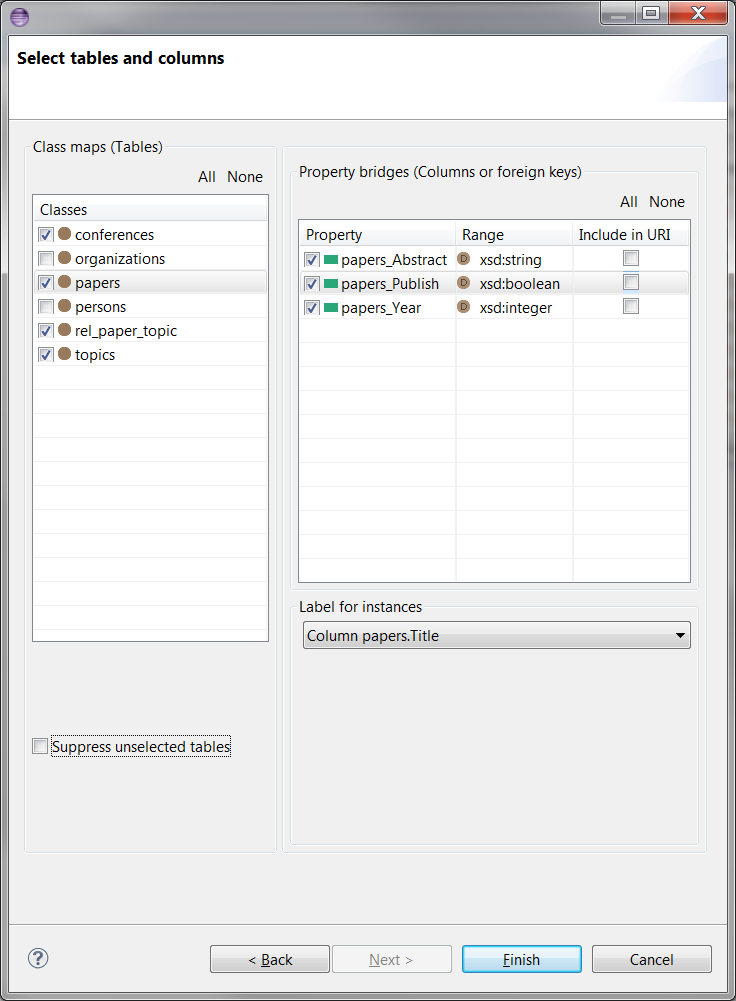
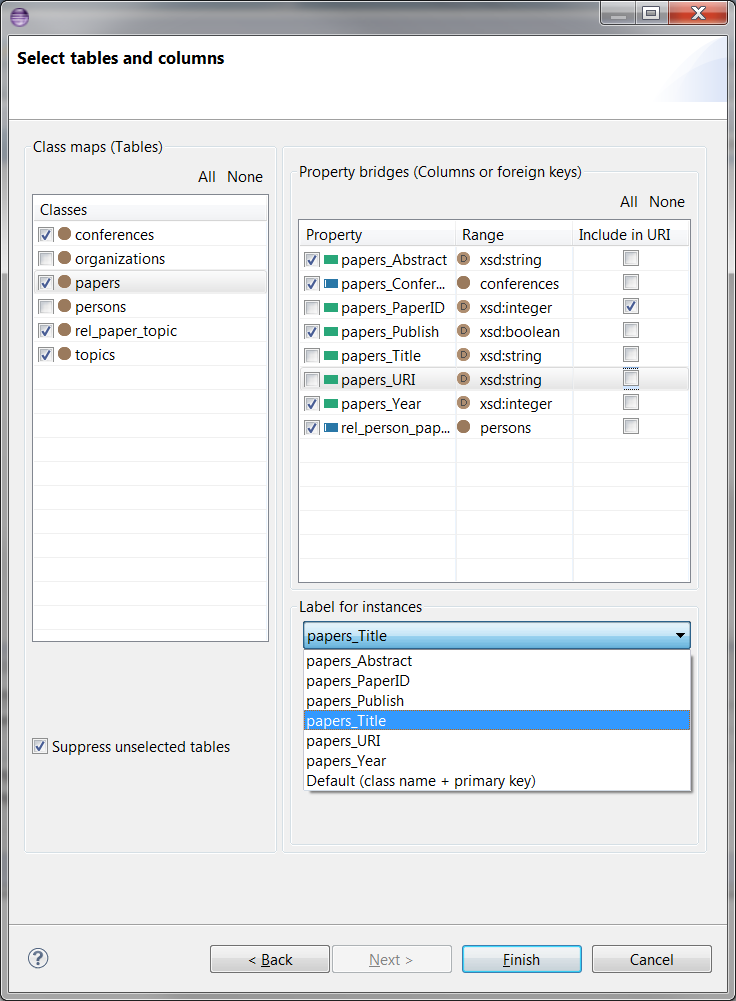
You can select a label for instances from a particular table by using the drop-down list of Label for instances. If there is no other label, then Default (class name + primary key) option would be selected by default. Other options come from column values. If you don't want a property to be generated from a column, but still want to use the column value for instances, then you can unselect the column and pick the same column from Label for instances drop-down list. An example of this and some table and column selections are shown below:
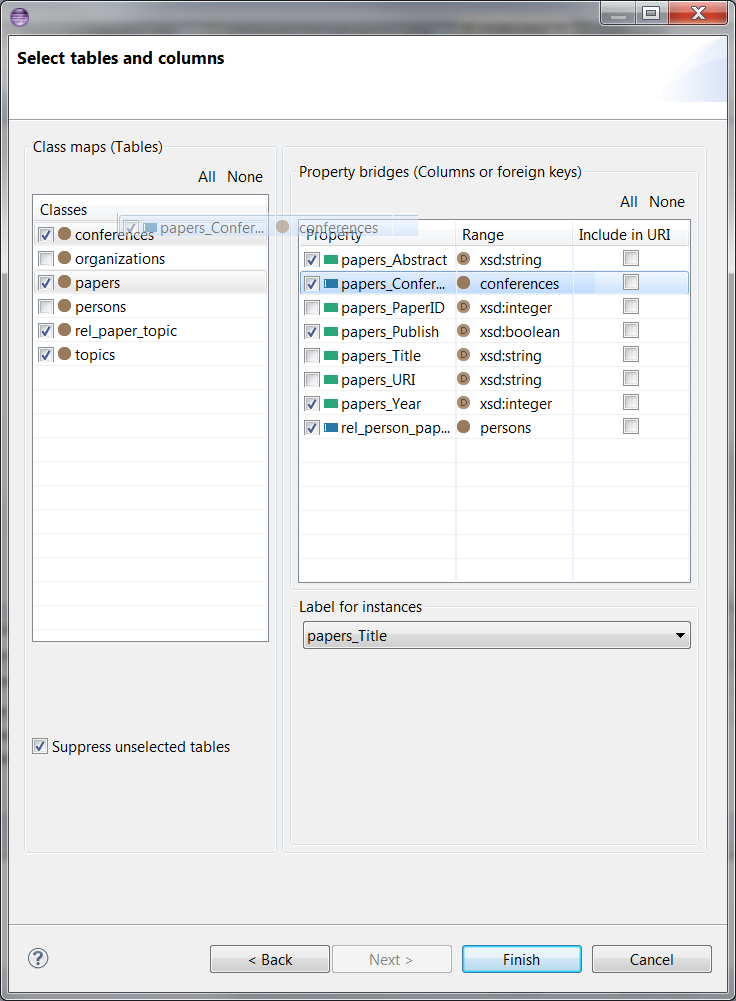
You can swap the domains and ranges of object properties. Please drag and drop an object property onto the range class on the left. For consistency with the D2RQ mapping, the wizard would only let you to drop the property onto the range class and not others. After the operation, the domain and range will be swapped, and while the property will be appearing in the Property Bridges list for the dropped class, it will disappear from the list of the class that it was dragged from. Here is an example drag and drop:
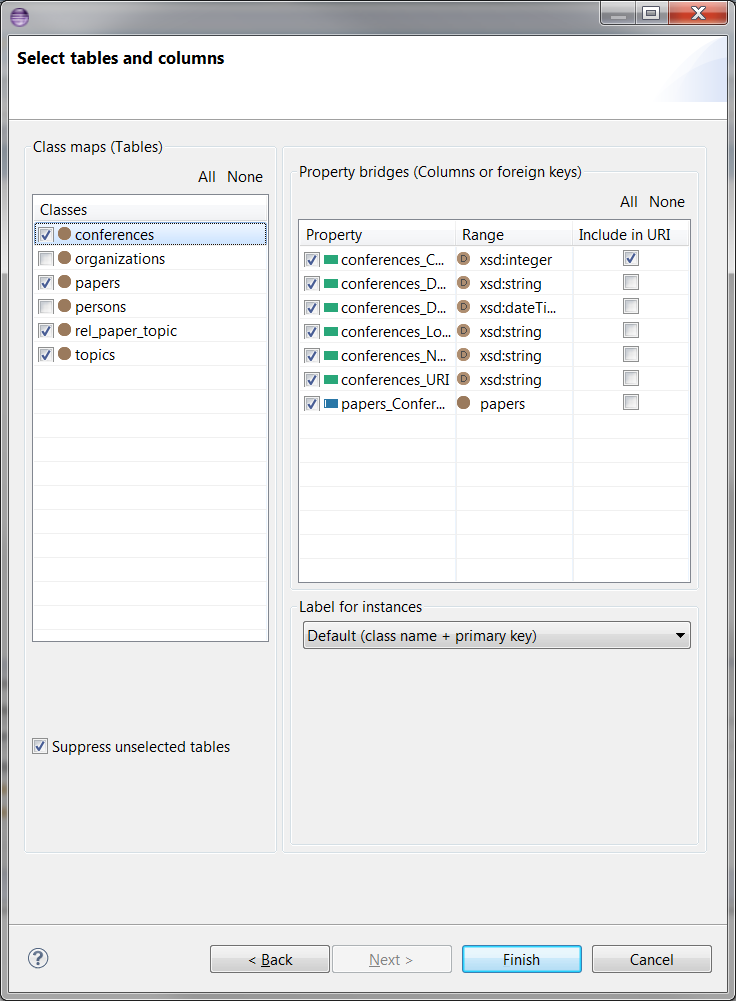
And here is what happens after the drag and drop:
If you want to modify any of the connection metadata in the first page of the wizard, you can go back and modify it. However, this would reset the table, column and label selections back to default.
After you click Finish, you will get a dialog like this:
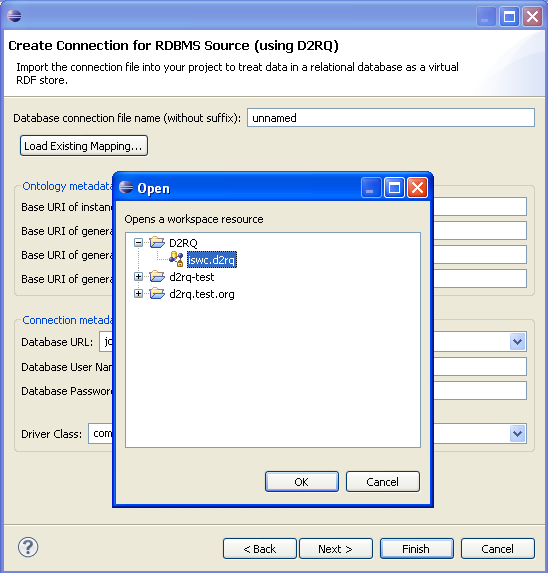
For modifying an existing mapping, after opening the wizard, please click on Load Existing Mapping... button and select the .d2rq connection file as shown in the following:
After the file is selected, the workspace-relative file path will be shown in Database connection file name field. The baseURIs (uneditable for now) and connection metadata will be loaded from the related mapping files as shown below. If the Database connection file name field is edited again with an existing file name, then all the other fields will be loaded from that file. If the file name doesn't exist, then the other fields will be filled as if creating a new connection.
Once you have an existing mapping in place, after you click the Next button, tables and columns will be loaded from the mapping files and not from the database. Label mappings will also be loaded from the mapping files. An example is shown in the following:
By default, unselected tables are not loaded with the Suppress unselected tables selection as shown above. On the other hand, if a user unselects a table, then it will still be displayed until the selection for Suppress unselected tables is changed. If you unselect Suppress unselected tables, then the unselected tables and their columns will be loaded from the database as shown in the following.