The Instances View is available if a selected resource is a Class. When you switch from a Class to another type of resource, such as a Property or an Instance, the Instances View will continue to display instances of the most recently selected Class, so that you can easier drag and drop objects.
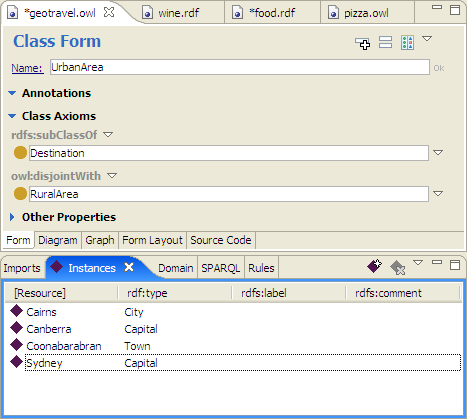
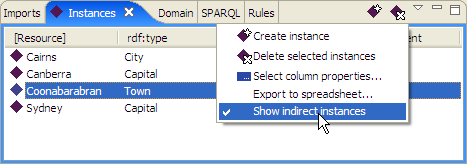
The screenshot below shows the UrbanArea class and its instances. Note that in this image, the table also shows the indirect instances, i.e. those that have been declared to be instances of subclasses of UrbanArea (City, Capital etc) - this option must be activated from the drop down menu in the upper right corner.

The following actions are available either from the icon bar or via right-click on an instance:
The drop down menu in the upper right corner of the view provides additional options, in particular to select which columns to show and to export the table into a spreadsheet. These features can be used to create reports from a model.

To edit an instance, select it by double clicking or by single clicking on the icon to the left of the instance id. The selected instance will appear in the Form Panel where it can be edited.
One of the key features of the Instances View is the ability to add arbitrary new columns to it. You can use Select column properties... and select the properties you want to show. Alternatively you can drag and drop any property from the Properties View into the Instances View to add a column for it. The selected properties are selected on a by-class basis and will be inherited down the subclasses tree.
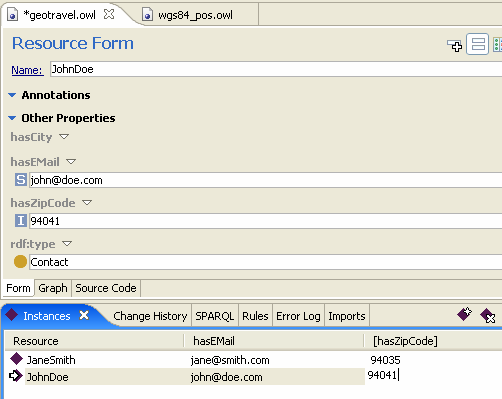
You can also edit the datatype or annotation property values of the instances in the table. In order to edit a value, just click on the value in the table, and the value cell will become an editor. You must enter a value that is valid with respect to the datatype of the cell. After you are finished with editing, you can click outside of the value cell to store the new value. When you are done editing a cell, by not clicking outside the cell, you can also navigate around other editable fields in the table by using the enter key or arrow keys while holding down the CTRL key. The following example shows how a value cell editor looks like:
