The Form Panel in the Resource Editor is used to view and modify Class, Property and Instance definitions. You will probably do most of your ontology development work using Forms.
Note that the layout and content of these forms can be customized using the Form Layout Page, for example if you want to see less cryptic labels than rdfs:subClassOf. The following paragraphs describe the default form layout.
Sections and Widgets
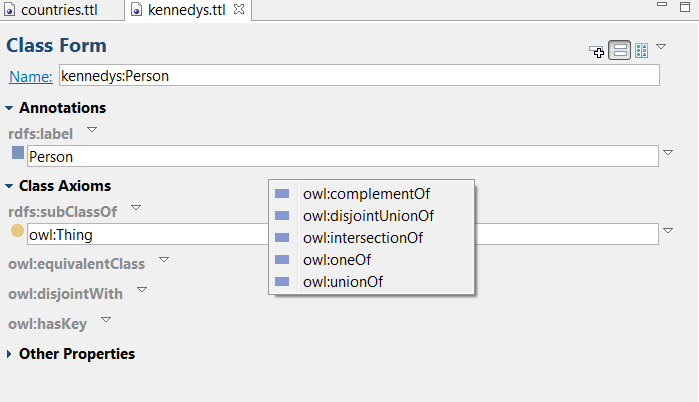
Forms contain sections that can be collapsed and expanded by clicking on a blue triangle to the left of the section name. In the screenshot of a Class Form below, Annotations, Class Axioms and Other Properties are sections.
Sections contain widgets for applicable properties. For example, the Class Axiom Section above contains the following widgets:
If the class has over 200 properties, instead of showing them all, Composer will include a message in red about how many are not shown—for example, "Suppressing 6 other properties."
Other widgets that are not shown on the form can be added, e.g. by right-clicking on the section title. This would bring up a popup menu as shown above.
Most of the sections on a form represent "forward" references (technically: an RDF triple that has the currently selected resource as subject, and the displayed value as object). However, since TopBraid 3.0, there is also a dedicated section called Incoming References that displays "backward" references. These should be understood in the opposite direction (indicated by a left-pointing arrow): technically they are RDF triples that have the currently selected resource as an object. This capability makes it easy to see where the resource is being used.
Depending on the type (defined via range or restrictions) of the underlying property, widgets can contain text, OWL axioms, rules, SPARQL queries or references to other resources. The system makes sure that only "valid" values can be entered into a widget. For example, if the type of the property is xsd:float, then the system will reject anything but numbers. If a property points to other resources (such as an owl:ObjectProperty), then it is possible to enter links to arbitrary URIs: enter the URI wrapped with angular brackets, e.g. <http://www.knublauch.com/images/platypus.jpg>.
Any resource name or URI displayed on a Form can be turned into a hyperlink by pressing CTRL or Alt/Option and mousing over it. Clicking on it will bring that resource as the current selection within the Form Panel. If a property value points to some external resource (inside <...>), then clicking on the hyperlink will open the corresponding web page.
If a resource shown in the Form Panel is imported, then at the Name field at the top of the panel, you can navigate to the definition of the resource in its imported model by pressing CTRL or Alt/Option and mousing over it and then clicking on it.
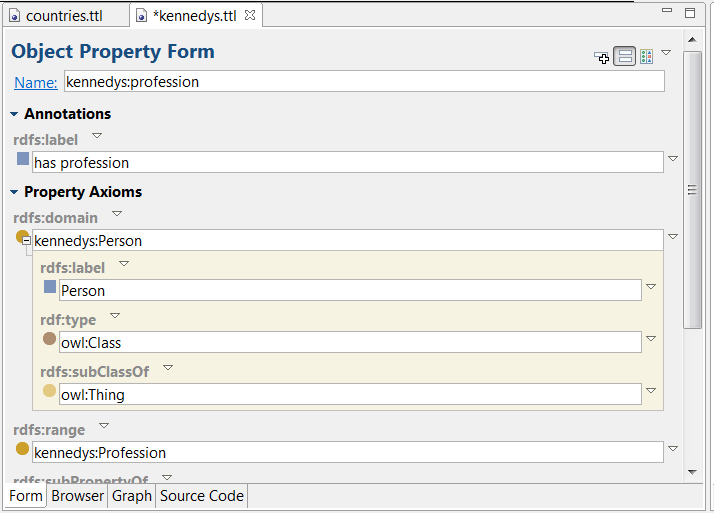
In addition to this ability to navigate to linked resources, you can also display detailed information about a linked object inside the form. If a property value is a resource, you can mouse over its icon and press the + button to open a nested sub-form. In the following screenshot, the definition of the class Contact is shown within the context of hasCity. The nested sub-form will by default only show those properties that have a value for the subject. In order to add additional property widgets, you can either drag and drop properties from the Properties View onto the sub-form, or you can right-click on an empty area of the form to get additional options.
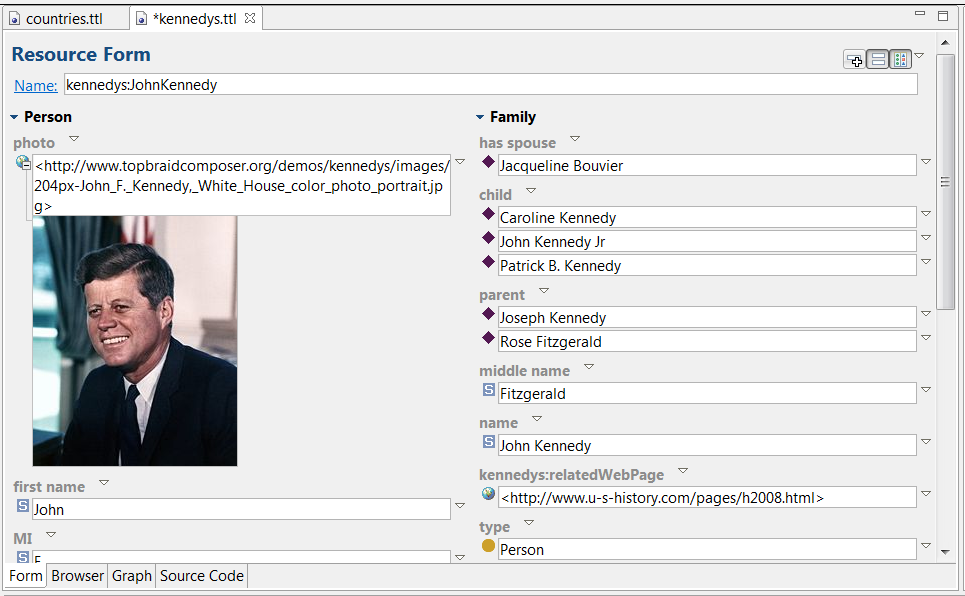
If a resource is an image (ending with, for example .jpg), then the same +/- minus feature will show an embedded image:
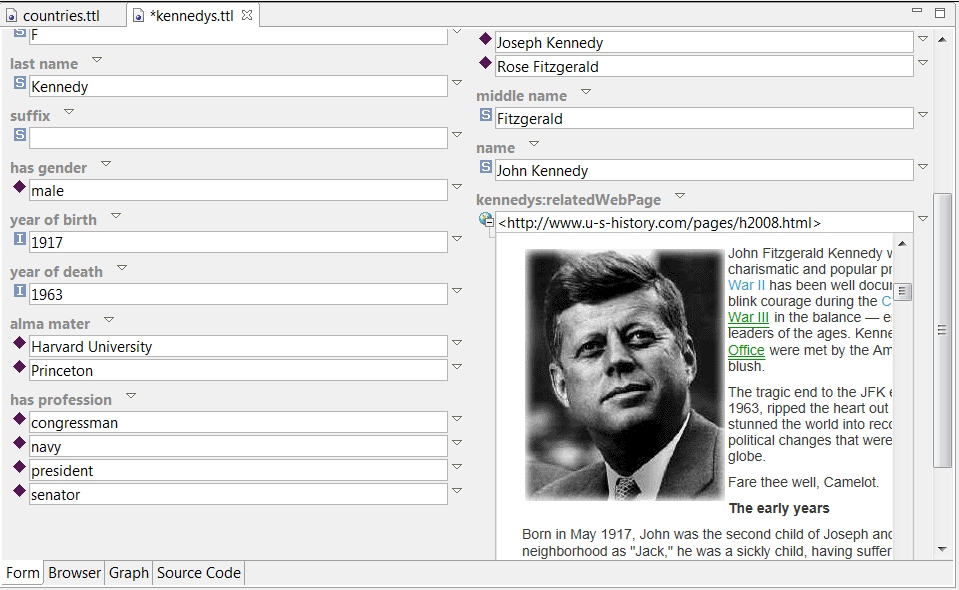
If a linked resource is a web page (ending with .html etc), then you can even open an embedded web browser:
TopBraid Composer provides an auto-complete feature to assist you when you type in the widgets' entry lines. Auto-complete is invoked by pressing CTRL and space. You can also avoid typing almost entirely by dragging and dropping resources onto the entry lines. For example, you can drag a class from the Classes tree to the rdfs:subClassOf label to add a superclass relationship. Or you can drag the icon beside a property value elsewhere on the form
To the right of each widget name, there is a white down-facing triangle, right-clicking on it brings up a menu specific to the widget. The contents of this menu will change depending on the property and current values.
Form Icons and Menu Options
Additional widgets can be added to the Form by:
If you right-click anywhere on the form (assuming the form is not too busy), you will get a list of all sections. If you right-click directly to the right of a section name, you will get a list of only the applicable properties for the section.
What widgets are shown on the form by default is controlled by
![]() icon.
When the icon is selected the Form will contain widgets for properties a
given Resource is in the domain of, or properties that are restricted at the
type of the resource. When it is unselected the Form will show only widgets
that have values in them.
icon.
When the icon is selected the Form will contain widgets for properties a
given Resource is in the domain of, or properties that are restricted at the
type of the resource. When it is unselected the Form will show only widgets
that have values in them.
Widgets can be displayed on the Form using a single or double column format.
This option is controlled by the widget layout
![]() icon.
icon.
The fourth icon in the form - downfacing triangle to the right of the layout icon - opens up a drop-down menu with a variety of other functions that can be applied to the resource on the form. All the functions from the Resource menu are also available here.
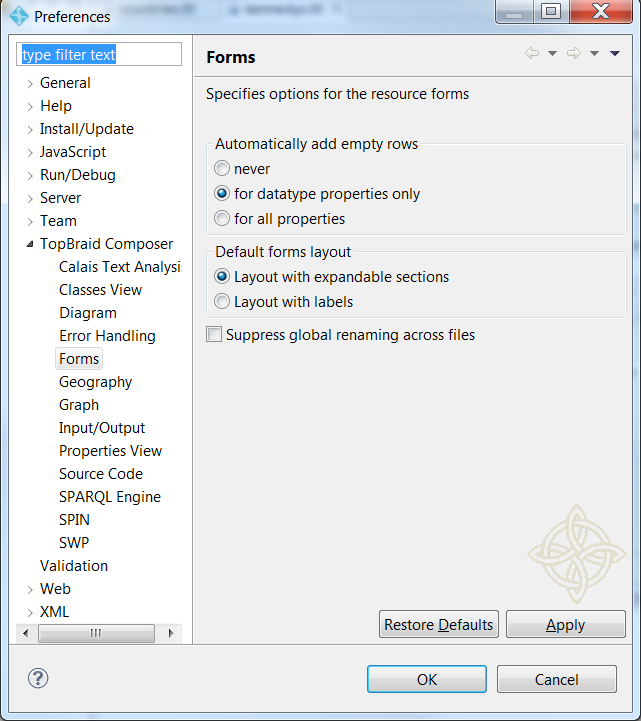
There is also an option to automatically insert empty rows to widgets, as shown below. This is particularly useful if you need to enter lots of values without going through the additional step to "Add empty row". The corresponding option can be found in the Forms preferences dialog. In the screen shown below, the option to "Automatically add empty rows for datatype properties only" has been selected,
and input fields for MI, suffix, year of death, and middle name are provided even if no values exist yet:
![]()
Related Topics
How to Create local restrictions
How to Define classes as intersections, unions and complements